| Lesson 6 | Setting Column Attributes |
| Objective | Modify Column Headings and display Width. |
Setting Column Headings and Display Width in SQL*Plus
SQL*Plus is more than a command-line tool for running queries; it can also format result sets so they read like printable reports. In this lesson, you will learn how to use SQL*Plus environment commands to:
- Change column headings to user-friendly labels.
- Control the display width of character and numeric columns.
- Improve readability using word wrapping and basic report settings.
These techniques are especially useful when you turn frequently used queries into scripts that you run on a regular basis (for example, month-end reports).
Key SQL*Plus Environment Commands
The main commands you will use to adjust headings and widths are COLUMN and SET. Together they control how each column and each line is presented in your SQL*Plus output.
| SQL*Plus Environment command | Description | ||||||||||||||||
COL[UMN] column_name options… |
Defines display attributes for a column in the result set. Common options include:
|
||||||||||||||||
SET attribute |
Adjusts global environment settings that affect the entire report. Some commonly used attributes when formatting columns are:
|
||||||||||||||||
SHOW [ALL | attribute] |
Displays the current environment settings for all attributes or for a specific attribute. |
With a few well-chosen COLUMN and SET commands, you can turn a wide, raw query into a compact report that fits the window or page and uses clear, business-friendly headings.
Example: Improving a Report with Column Settings
The following eight images (and their captions) illustrate a typical workflow in which a saved query is reformatted into a readable report.
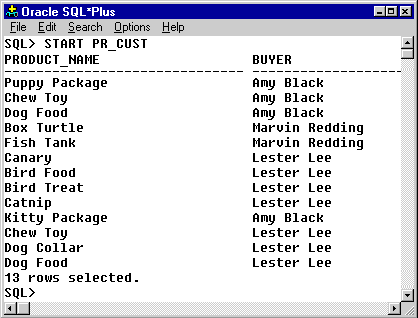
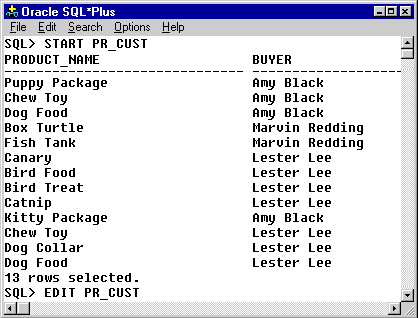
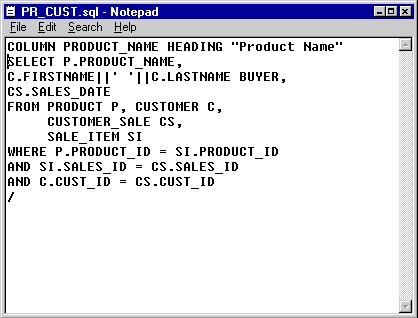
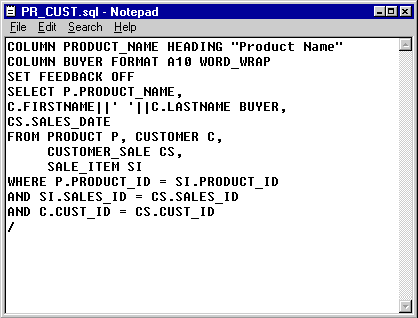
COLUMN command for PRODUCT_NAME to set a clearer heading. Quoted text allows spaces and mixed case, for example:
COLUMN product_name HEADING "Product Name".
COLUMN commands must appear before the query so that the environment is set before SQL*Plus formats the result.
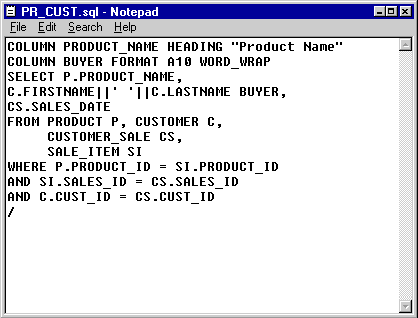
COLUMN buyer FORMAT A10 WORD_WRAPPED
This limits the column to 10 characters and wraps longer names to the next line between words instead of truncating them.
SET FEEDBACK OFF
This is often preferred for printed or exported reports where the row count is not needed.
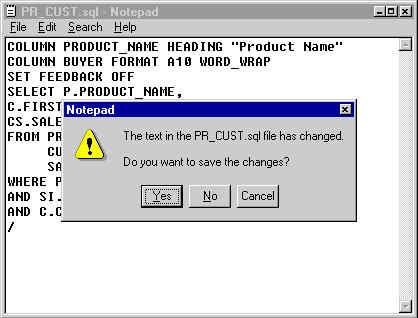
PR_CUST.sql).
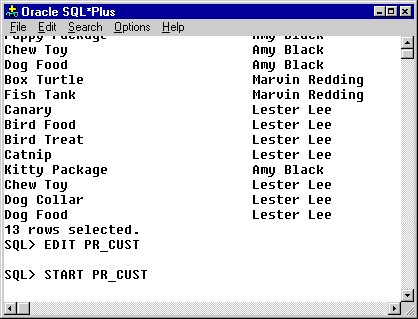
START PR_CUST or @PR_CUST.
SQL*Plus first applies the COLUMN and SET settings, then runs the query.
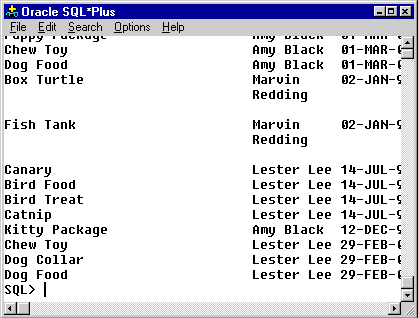
Putting It All Together in a Script
In practice, you will usually combine COLUMN and SET commands at the top of your script so every run of the report uses the same formatting. A typical header section might look like this:
COLUMN sales_date  HEADING "Sales Dt"
COLUMN lastname    FORMAT A15      HEADING "Name"
COLUMN prod_count  FORMAT 99       HEADING "# Items"
COLUMN total_sale  FORMAT 9999.99  HEADING "Total"

SET PAGESIZE 22
SET LINESIZE 45
SET FEEDBACK OFF
Below these commands, you place the query itself. When you run the script with @script_name, SQL*Plus applies all the formatting settings and then prints the result set in the desired layout. Because these are SQL*Plus environment settings, you can easily adjust them as your report requirements evolve.
In the next lesson, you will extend this approach by using other SQL*Plus environment settings to control page breaks, titles, and more advanced report formatting options.