| Lesson 2 | Overview of inserting data |
| Objective | Describe how to insert data with Transact-SQL. |
Inserting Data Using the INSERT Statement and Transact-SQL
To insert data into a table, you use the
INSERT Transact-SQL statement. With INSERT you can specify the names of specific columns to insert data into, or insert data into every column in the table.
Transact-SQL INSERT Syntax
The basic form chooses a target table, lists the columns being supplied, and then supplies the matching rows of values:
INSERT INTO dbo.Product (ProductName, Price)
VALUES (N'Keyboard', 75.00),
       (N'Mouse', 25.00);
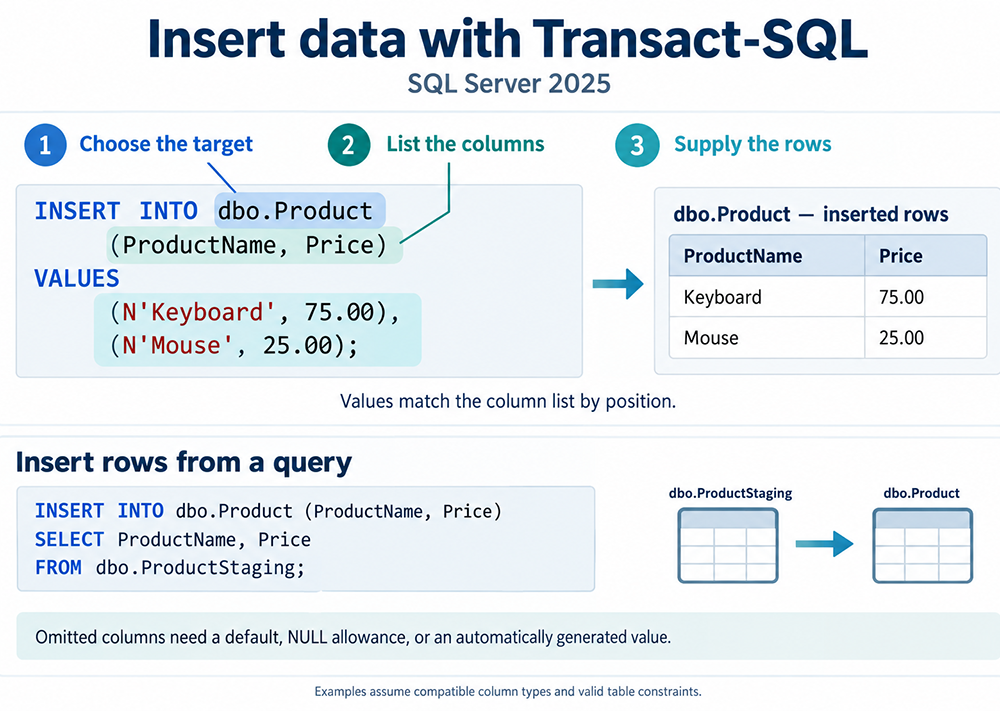
Values match the column list by position, the first value in each row goes to the first listed column, and so on. The column list is optional if your values are already in the table's own column order, but listing columns explicitly is good practice, since it keeps the statement correct even if the table's column order changes later.
If you omit a column from the column list entirely, that column needs a default value, must allow
If you omit a column from the column list entirely, that column needs a default value, must allow
NULL, or must be automatically generated (an IDENTITY column or a computed column), otherwise the insert fails.
Inserting Rows From a Query
INSERT ... SELECT copies rows from one existing table into another:
INSERT INTO dbo.Product (ProductName, Price)
SELECT ProductName, Price
FROM   dbo.ProductStaging;
dbo.Product here) to already exist. Don't confuse this with SELECT INTO, covered below, which does the opposite: it creates a new table for you.
Inserting Data From a File
For loading data from an external file, such as a CSV export,
BULK INSERT reads rows directly from disk:
BULK INSERT dbo.Product
FROM 'C:\data.csv'
WITH (FORMAT = 'CSV', FIRSTROW = 2);
FIRSTROW = 2 skips a header row in the source file.
SELECT INTO: Creating a New Table From a Query
SELECT INTO is easy to confuse with INSERT INTO ... SELECT, but it does something different: it creates a brand-new table, shaped by the query's own columns and types, and populates it in one step.
SELECT ProductName, Price
INTO   dbo.ProductArchive
FROM   dbo.Product
WHERE  Discontinued = 1;
dbo.ProductArchive already exists, this fails; SELECT INTO is for creating a table, not inserting into one that's already there.
Capturing What Was Inserted
The
You can also use the
OUTPUT clause returns the values of the rows you just inserted, without a separate query:
INSERT INTO dbo.Product (ProductName, Price)
OUTPUT INSERTED.ProductID, INSERTED.ProductName
VALUES (N'Monitor', 150.00);
IDENTITY value right after the insert, rather than querying for it separately afterward.
You can also use the
DEFAULT keyword inside a VALUES list to explicitly use a column's default value for one row while supplying literal values for the others:
INSERT INTO dbo.Product (ProductName, Price, Discontinued)
VALUES (N'Webcam', 45.00, DEFAULT);
The IDENTITY Column
Because SQL Server automatically generates values for an
IDENTITY column, it blocks you from supplying your own value for that column in an ordinary INSERT, unless you explicitly turn that protection off first:
SET IDENTITY_INSERT dbo.Product ON;

INSERT INTO dbo.Product (ProductID, ProductName, Price)
VALUES (500, N'Legacy Item', 10.00);

SET IDENTITY_INSERT dbo.Product OFF;
IDENTITY_INSERT:
- Only one table per session can have
IDENTITY_INSERTset toONat a time. If you try to turn it on for a second table while it's still on for another, SQL Server returns an error. - Turn it back
OFFonce you're done with the explicit insert, so the table returns to its normal auto-generating behavior for everyone else. - A table can only have one
IDENTITYcolumn; SQL Server doesn't allow more than one per table.
Summary
A short recap before the next lesson:
- The basic
INSERT INTO table (columns) VALUES (...)form matches values to columns by position, and supports inserting several rows in one statement. INSERT ... SELECTcopies rows from an existing table into another existing table;SELECT INTOdoes the opposite, creating a brand-new table from a query's results.BULK INSERTloads data directly from an external file, such as a CSV export.- The
OUTPUTclause returns the values of rows you just inserted, which is the standard way to retrieve a generatedIDENTITYvalue without a follow-up query. IDENTITY_INSERTlets you explicitly supply values for anIDENTITYcolumn, but only one table per session can have it switched on at a time, and it should be turned back off once you're done.
In the next lesson, you will get an overview of the
UPDATE statement, which is used to update data in your tables.