| Lesson 2 | Configuring Enterprise Manager to use RMAN |
| Objective | List the Steps to configure Enterprise Manager for RMAN |
Configuring Enterprise Manager to use RMAN
For administrators to be most effective, they must be able to identify and clearly organize the complete set of managed systems such as databases, nodes, application servers, and applications. OEM extends the administrator's reach beyond the data server, providing a centralized management foundation for the complete set of Oracle products.
- Oracle Parallel Server,
- Oracle Applications,
- Oracle Forms
Creating a Recovery Catalog
RMAN can be used either with or without a recovery catalog. A recovery catalog is a schema stored in a database that tracks backups and stores scripts for use in RMAN backup and recovery situations. An experienced DBA would suggest that
The RMAN schema generally only requires 17 megabyte per year per database backed up. The RMAN schema owner is created in the RMAN database using the following steps:
Once the owner user is created, the RMAN recovery catalog schema can be added:
Below are a series of image that contain the code requirements for REPORT commands and illustrates the step-by-step requirements for configuring OEM for Recovery Manager.
- the Enterprise Manager instance schema and
- RMAN catalog schema
The RMAN schema generally only requires 17 megabyte per year per database backed up. The RMAN schema owner is created in the RMAN database using the following steps:
- Start SQL*Plus and connect as a user with administrator privileges to the database containing the recovery catalog. For example, enter:
CONNECT SYS/oracle@catdb AS SYSDBA
- Create a user and schema for the recovery catalog. For example, enter:
CREATE USER rman IDENTIFIED BY cat
TEMPORARY TABLESPACE temp
DEFAULT TABLESPACE tools
QUOTA UNLIMITED ON tools;
- Grant the recovery_catalog_owner role to the user. This role provides all of the privileges required to maintain and query the recovery catalog:
SQL> GRANT RECOVERY_CATALOG_OWNER TO rman;
Once the owner user is created, the RMAN recovery catalog schema can be added:
- Connect to the database that contains the catalog owner. For example, using the RMAN user from the above example, enter the following from the operating system command line. The use of the CATALOG keyword tells Oracle this database contains the repository:
% rman CATALOG rman/cat@catdb
- It is also possible to connect from the RMAN utility prompt:
% rman
RMAN> CONNECT CATALOG rman/cat@catdb - Now, the CREATE CATALOG command can be run to create the catalog. The creation of the catalog may take several minutes. If the catalog tablespace is this user's default tablespace, the command would look like the following:
CREATE CATALOG;
While the RMAN catalog can be created and used from either a 9i or 10g database, the Enterprise Manager Grid Control database must be a 9i database. This is true at least for release 1, although this may change with future releases. Each database that the catalog will track must be registered.
Configuring OEM for Recovery Manager
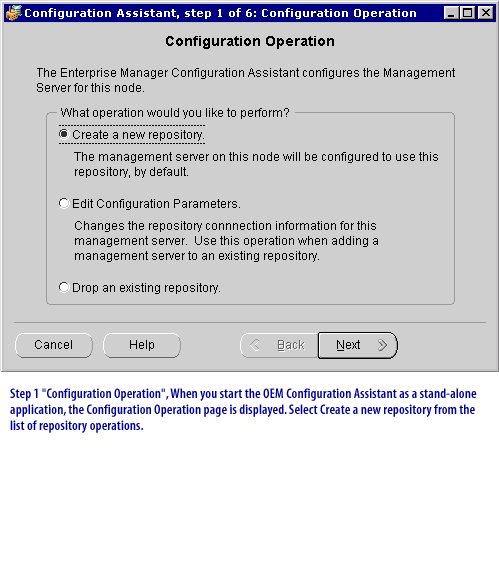
- Step 1: Configuration Operation, when you start the OEM Configuration Assistant as a stand-alone application, the Configuration Operation is displayed.
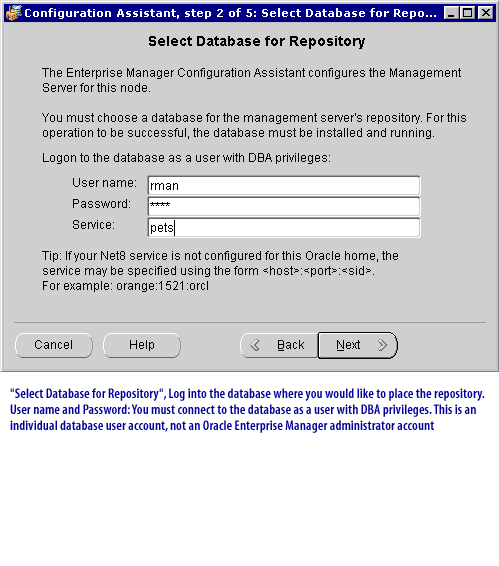
- Select Database for Repository, log into the database where you would like to place the repository. User name and Password: You must connect to the database as a user with DBA privileges.
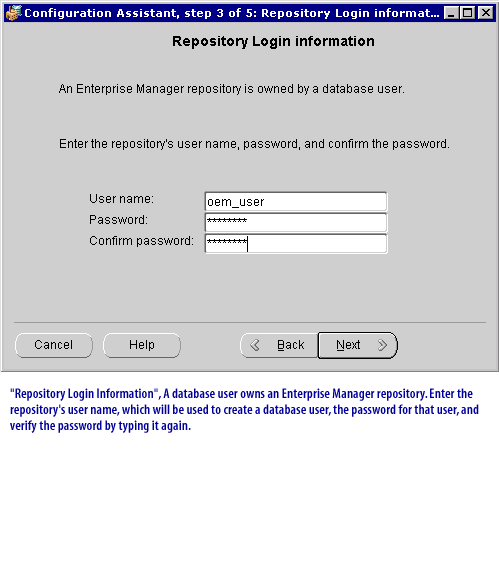
- Repository Login Information: A database user owns an Enterprise Manager repository. Enter the repository's user name, which will be used to create a database user, the password for that user, and verify the password by typing it again
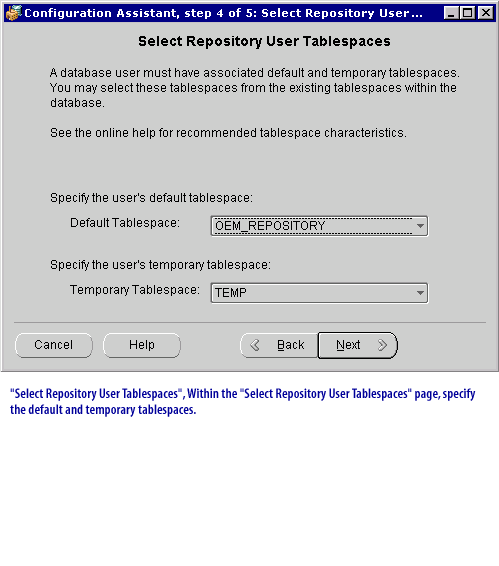
- Select Repository User Tablespaces, Within the "Select Repository User Tablespaces" page, specify the default and temporary tablepsaces.
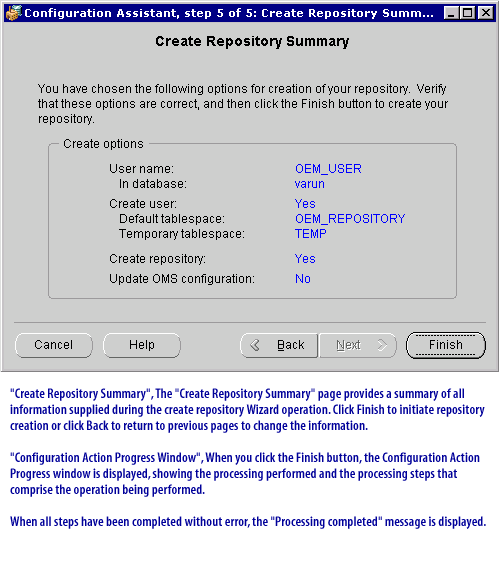
- (Create Repository Summary), The "Create Repository Summary" page provides a summary of all information supplied during the create repository Wizard operation.
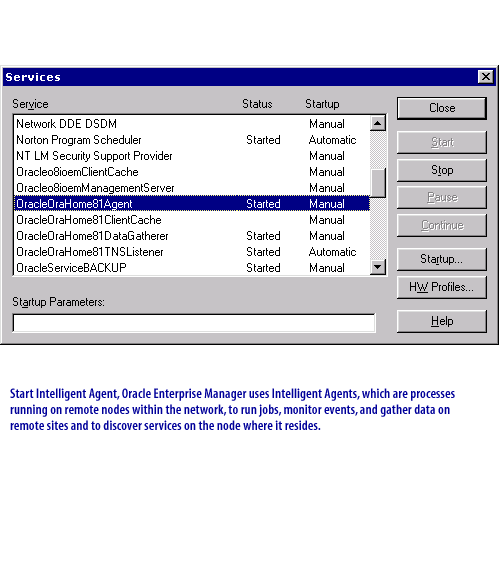
- Start Intelligent Agent, Oracle Enterprise Manager uses Intelligent Agents, which are processes running on remote nodes within the network, to run jobs, monitor events, and gather data on remote sites and to discover servics on the node where it resides.
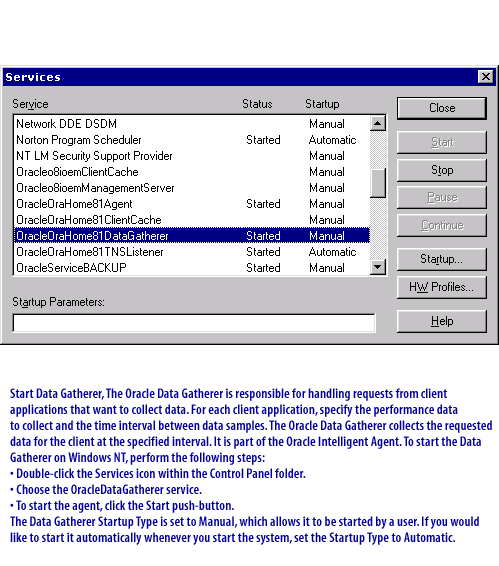
- Start Data Gatherer, The Oracle Data Gatherer is responsible for handling requests from client applications that want to collect data. For each client application, specify the performance data to collect and the time interval between data samples.
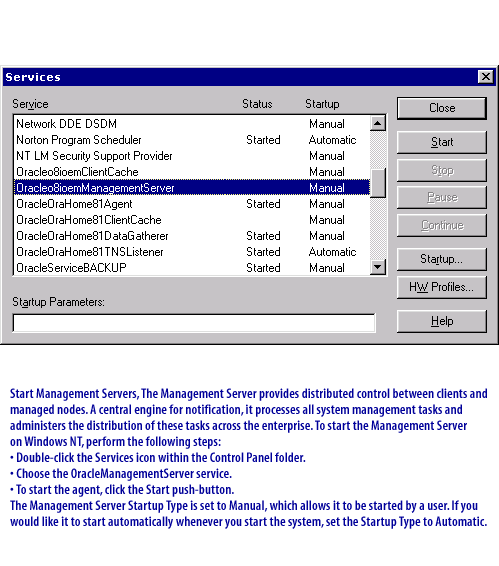
- Start Management Servers, The Management Server provides distributed control between clients and managed needs. A central engine for notification, it processes all system management tasks and administers the distribution of these tasks across the enterprise.
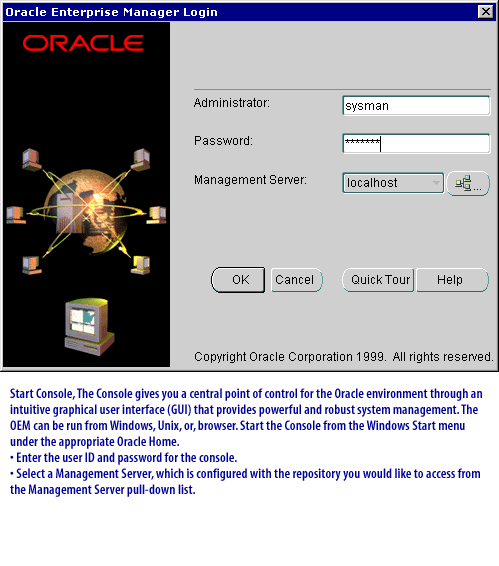
- Start Console, The Console gives you a central point of control for the Oracle environment through an intuitive graphical user interface (GUI) that provides powerful and robust system management.
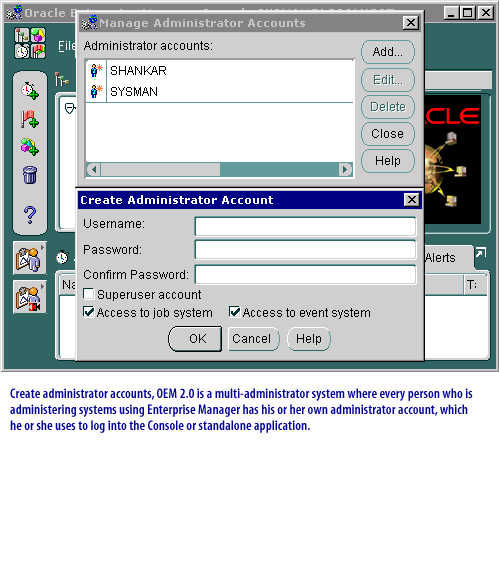
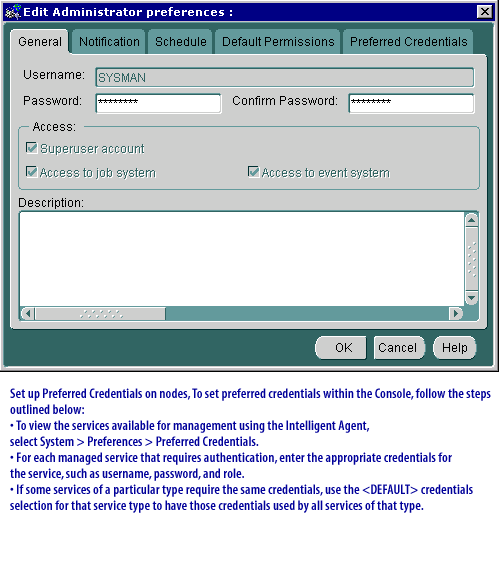
- Create Administrator accounts, OEM 2.0 is a multi-administrator system where every person who is administering system using Enterprise Manager has his or her own administrator account, which he or she uses to log into the Console or standalone application.
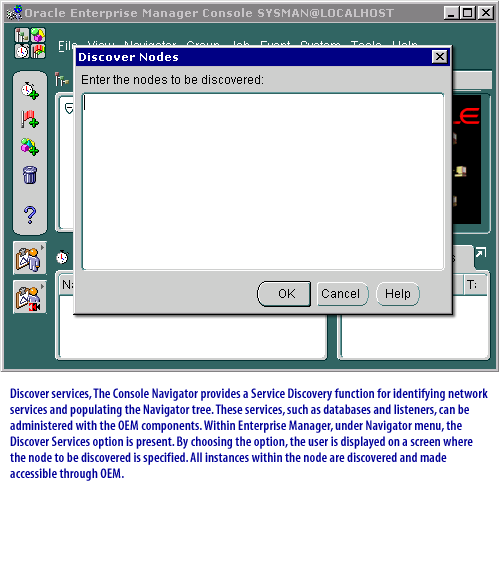
- Discover services, The Console Navigator provides a Service Discovery function for identifying network services and populating the Navigator tree.
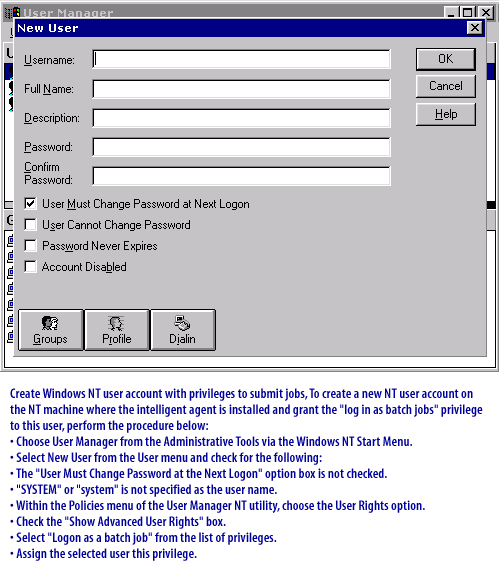
- Create Windows user account with privileges to submit jobs, To create a new Windows user account on the Windows machine where the Intelligent agent is installed and grant the 'log in as batch jobs' privilege to this user, perform the procedure below:
- Set up Preferred Credentials on nodes, To set preferred credentials within the Console, follow the steps outlined below: 1) To view the services available for management using the Intelligent Agent, select System -> Preferences -> Preferred Credentials
Configuring OEM
For additional details of the steps enumerated in the above series of images, follow the link
Configuring View Table contains additional information.
The next lesson launches RMAN using OEM.