| Lesson 10 | Perform database recovery with interactive RMAN |
| Objective | Use Recovery Manager (GUI tool) to recover a failed database. |
Recover Failed Database using Orcle Recovery Wizard
The Recovery Wizard guides you through the process of specifying what you want to restore and recover and submits a recovery job through the Enterprise Manager to complete the operation.
As you already know, RMAN is available in two modes, the line mode and the GUI Mode. Typing RMAN at the DOS prompt of the host machine that has the OEM accesses the command line mode. The GUI mode is embedded within the Oracle Enterprise Manager (GUI). The GUI mode of RMAN offers the following advantages over the line mode:
As you already know, RMAN is available in two modes, the line mode and the GUI Mode. Typing RMAN at the DOS prompt of the host machine that has the OEM accesses the command line mode. The GUI mode is embedded within the Oracle Enterprise Manager (GUI). The GUI mode of RMAN offers the following advantages over the line mode:
- All the defaults are specified one time only, such as:
- Log into RMAN
- Name of the default channels
- Name of the target database and its userid/password
- Location of the backup sets
- The user need not remember all the commands to either back up or recover a database.
- The user need not worry whether any of the steps or commands has been missed during backup or recovery, because both backup and recovery are available in the form of wizards.
- The utilities of OEM are available to RMAN, such as the creation of jobs.
- The endpoint of the wizards can be stored as reusable code.
Recovery Wizard: Recovery Selection
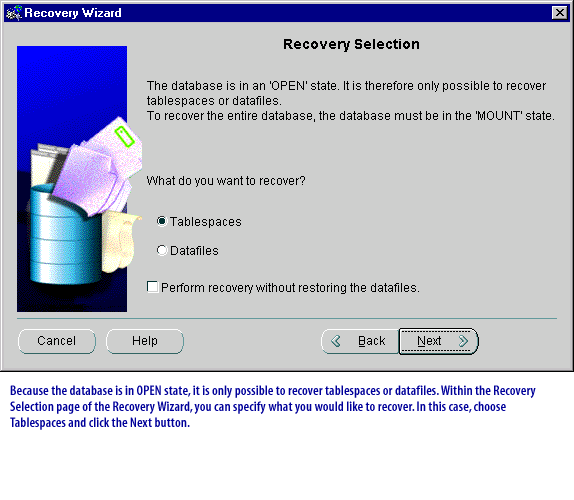
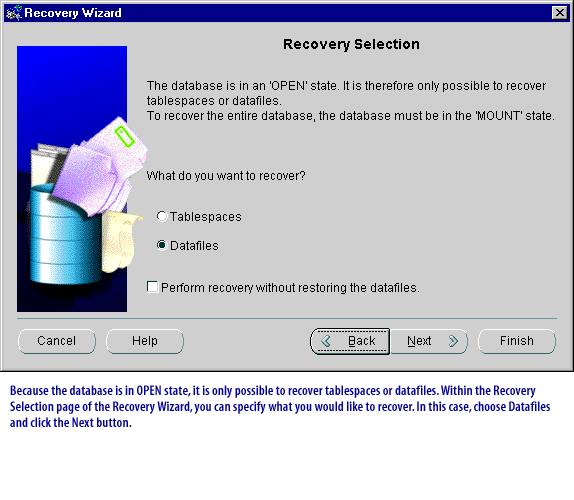
The Recovery Selection page of the Recovery Wizard allows you to select from types of recovery operations that you will see below.
If the database is mounted, but not open, all three options are available. If the database is open and within ARCHIVELOG MODE, only tablespaces and datafiles are available. The type of recovery you select determines the procedure that the Restore Wizard guides you through.
Perform recovery without restoring the datafiles
A checkbox "Perform recovery without restoring the datafiles" is available. By default, the checkbox is deselected.
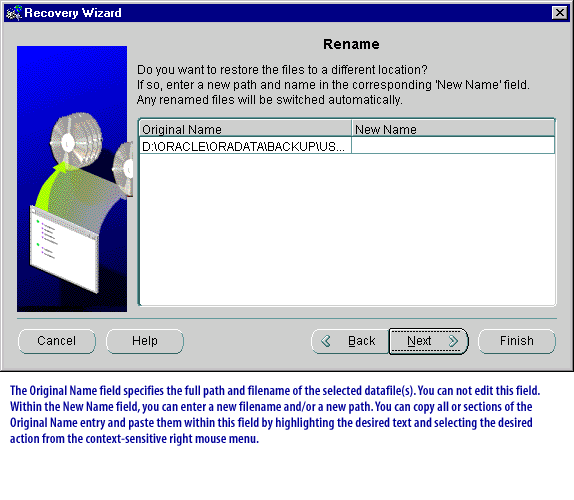
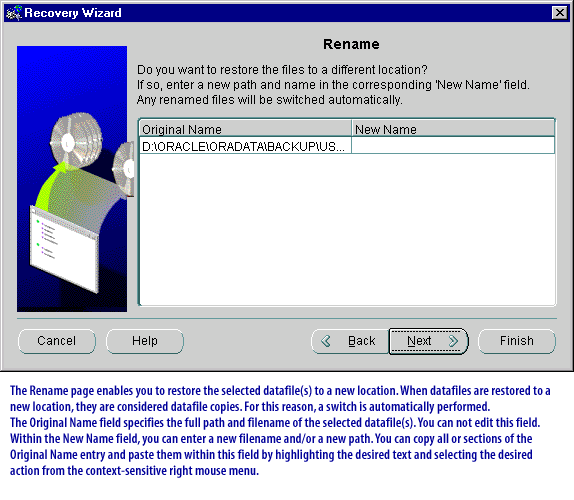
If you select the checkbox, a recovery is performed without a restore. The Rename page will not appear if you have selected this option.
Use the "Perform recovery without restoring the datafiles" option if the datafile exists and is not corrupted and the database only requires applying the redo logs to the datafile.
If you want to restore to a point previous to now, you must check the "Until" checkbox and enter a date and time when the date and time fields are activated.
Using the Recovery Wizard
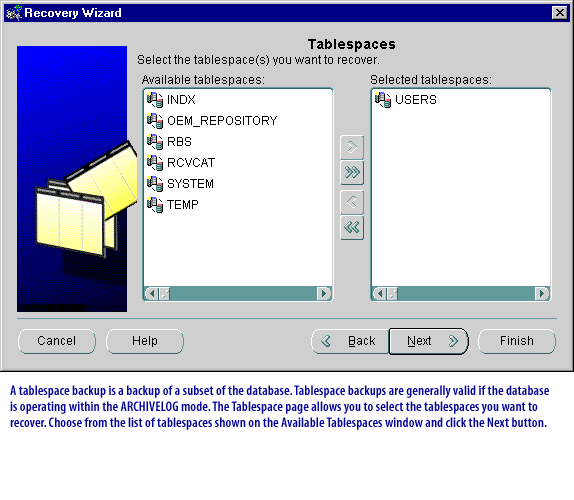
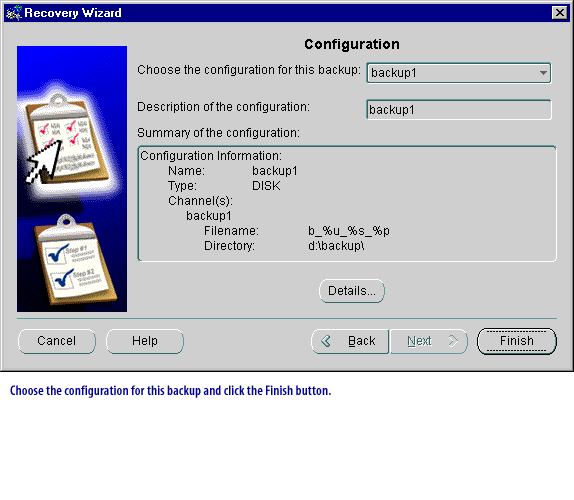
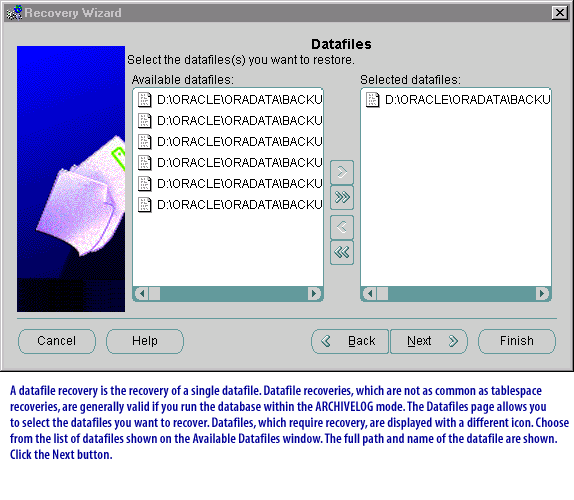
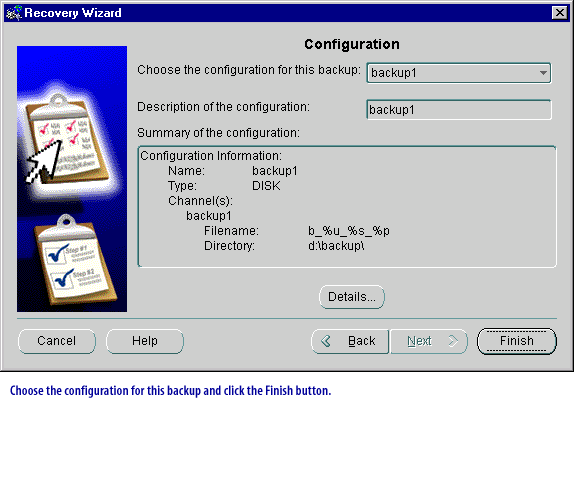
View the images below for an explanation of the recovery selection process using the Recovery Wizard for recovering tablespaces and datafiles. You can recover the entire database to the latest time or to a point in time if the database is in ARCHIVELOG mode and MOUNT state. The series of images explains the recovery selection process by using the Recovery Wizard for recovering tablespaces and datafiles.
Restore and recover the database using the default disk channel
To restore and recover the database using the default disk channel, perform the following steps:
- From the Backup Management menu, choose Recover to access the Recovery Wizard.
- On the Operation Selection page, select either Restore and recover, Restore only, or Recover only.
- On the Object Selection page, select Entire Database.
- Specify a range (recovery until time) on the Range Selection page of the Recovery Wizard.
You can select to recover the database to a point-in-time in the past if you have selected Restore and recover or Recover only on the Operation Selection page, and the database is in the MOUNT state and ARCHIVELOG mode. - You can specify a point-in-time in the past by giving a time, an SCN or a log sequence number if you had selected Restore only in the Operation Selection page.
- Later, in the process, wizard pages will appear in which you will have the option to perform the following tasks:
- Specify to restore the files to a different location and rename them; thereby making datafile copies.
- Select the default configuration or any of the user created configurations for the backup. A default configuration is created by Enterprise Manager for each target database.
Recovering Oracle Tablespaces
In the following simulation, we will recover a tablespace by using RMAN.
- Start Oracle Enterprise Manager (OEM) by using SYSMAN as the administrator, SYSMAN as the password, and click localhost as the management server. Click OK.
- The OEM screen is displayed. Click the Databases folder.
- When you right-click the target database, as we have done for you here, the OEM displays the different options available for backup and recovery. Select Recovery from the Backup Management options.
- This screen serves as a starting point for the recovery of a tablespace. Click Next.
- Here, we specify that the recovery is for a tablespace and we do not want the data files to the restored. Click Next.
- Here, we choose the tablespace that needs to be restored. In this case, the tablespace is temp. Click Next.
- Here, we choose the backup configuration. This helps in identifying the location of backups. In this case, it is "backup1." Click Finish.
- OEM summarizes the complete process of selection that we went through and inquires whether the process is correct. If so, it creates a job within OEM, which gets executed on the server side. This is the end of the simulation. Click Exit.
Restoring and Recovering Tablespaces in the Protected Database
This example demonstrates how to restore and recover one or more tablespaces in the protected database after they are accidentally dropped or corrupted. The example assumes that the database is up and running and that you will restore only the affected tablespaces.
To restore and recover one or more tablespaces:
The next lesson concludes this module.
- Ensure that the prerequisites described in "Prerequisites for Restoring and Recovering Data from Recovery Appliance" are met.
- Use RMAN to connect to the protected database as TARGET and the Recovery Appliance catalog as CATALOG.
- Restore and recover the affected tablespaces.
RUN{
SQL 'ALTER TABLESPACE users OFFLINE';
RESTORE TABLESPACE users;
RECOVER TABLESPACE users;
SQL 'ALTER TABLESPACE users ONLINE';
}
The next lesson concludes this module.