| Lesson 2 | Setting up validation for fields |
| Objective | Use the Validation Rule property to test data in MS Access |
Use Validation Rule to Test Data in Access 365 Tables
In a database, data quality is everything. If incorrect values enter your tables, every query, form, and report becomes less trustworthy. That’s why Access includes table-level validation features—so you can block invalid entries at the point of storage, not just in a form.
In this lesson you’ll learn how to use the Validation Rule property to enforce acceptable values for a field. A validation rule behaves a lot like query criteria: Access evaluates the rule when a record is saved, and rejects the entry if it fails. You can pair the rule with Validation Text so the user sees a clear message explaining what’s required.
Where validation rules can be applied
Access supports validation at multiple layers. Understanding the layers helps you decide where to enforce a rule:
- Field-level (table design) — Validates a single field value using the field’s Validation Rule property. This is the most common approach and the focus of this lesson.
-
Table-level (table design) — Uses the table’s Validation Rule property to compare multiple fields in the same row
(for example, requiring
EndDate >= StartDate). - Form control-level (form design) — Validates user entry in a specific form control. This is useful for immediate feedback, but it’s not a substitute for table-level validation (because data can enter tables through imports, append queries, or VBA).
Best practice in Access 365: treat table validation as your final gate, and use form-level validation only to improve the user experience (friendlier messages, earlier prompts, conditional UI logic).
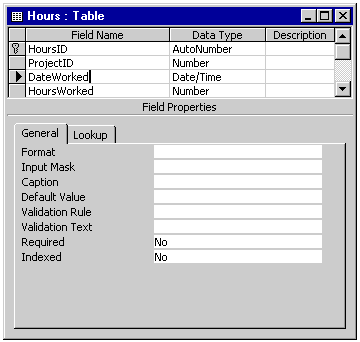
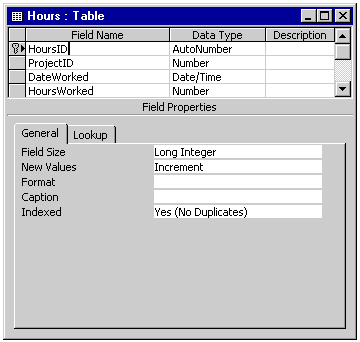
Setting up a field Validation Rule in table design
The following sequence shows the standard workflow for adding a field validation rule in Design View. You’ll use the Field Properties pane to define the rule, and then test it by entering data.

Validation Rule basics
A validation rule is an expression that must evaluate to True for the value to be accepted. If the expression evaluates to False, Access blocks the save and shows your Validation Text.
Validation rules are written using Access expression syntax (the same “criteria language” you see in queries).
You can use comparison operators (=, <, >, <=, >=, <>),
logical operators (AND, OR, NOT), and functions (like Date(), Len(), IsNull()).
A field-level rule is written as if it applies to the value being entered. For example:
>= 0(only non-negative numbers)Between 1 And 10(range constraint)In ("MI","OH","IN")(allowed list for a text field)Is Not Null(require a value; often used with Required = Yes)
Nulls, blanks, and the “OR Is Null” trap
A common surprise: after you add a validation rule, a field that used to allow blanks may start rejecting empty entries.
This happens because expressions that compare values (for example > 0 or >= Date()) don’t automatically
treat Null as “valid.” The safest approach is to decide explicitly:
- If the field must be filled in, set Required = Yes (and optionally use
Is Not Null). - If the field is optional, update the rule to allow Null, typically with
OR Is Null.
Example: allow Hours to be blank, but if entered, it must be greater than 0:
(> 0) OR Is Null
This explicit approach keeps behavior consistent across datasheet entry, forms, and imports.
Using the Expression Builder
You don’t have to memorize every function name. When you click in the Validation Rule property box, you can use the Builder button to open the Expression Builder and browse functions, operators, and built-in constants.

Date validation with Date()
In many databases, date fields are the first place validation rules pay off. For example, you might want to prevent “future work dates,” or require that a shipping date is today or later.
The built-in Date() function returns the current system date (today’s date). A typical rule looks like:
>= Date()
>= is the comparison operator, and Date() is the dynamic value being compared.
Because Date() changes every day, the rule stays current without hard-coding dates.
If the date field is optional, remember to allow Null:
(>= Date()) OR Is Null
Examples of practical field Validation Rules
The table below shows common rules, what you type into the Validation Rule property, and what the rule means in plain English. Use these as patterns and adapt them to your own field names and requirements.
| State | <> "WA" | State can’t be WA |
| ShippingDate | >= Date() | The date must be today or later |
| Amount | > 100 | Amount must be more than 100 |
| Hours | (> 0) OR Is Null | Hours must be greater than 0 if entered; blank is allowed |
| NumOfKids | <= 4 | Only four or fewer kids allowed |
Pattern-style rules (LIKE, Len, and allowed lists)
Access rules can also validate formatting and patterns:
-
Length checks (enforce exact character count):
Len([YourField]) = 5 -
Starts with a letter:
Like "M*" -
Allowed list (controlled categories without a combo box):
In ("Open","Closed","On Hold")
For user-friendly data entry, you’ll often pair these rules with either: Input Masks (format guidance) or combo/list boxes (controlled choices), which you’ll cover later in this module.
Table rules vs form control rules
Access can validate the same field at multiple layers. If you define a rule at the table-field level and also define a rule on a form control, Access attempts to enforce both rules. This can become a problem if the rules conflict.
Example conflict:
- Table field rule:
> 21 - Form control rule:
< 21
No value can satisfy both rules, so the user won’t be able to save any record. A clean design usually follows this pattern:
- Put the real constraint in the table (the database truth).
- Use the form only to improve guidance (optional rule “pre-checks” or friendlier messaging).
Automating Validation Rule setup with VBA
In Access 365, you can still set field properties programmatically with VBA. This is useful when you want repeatable configuration (for example, a script that sets rules consistently across multiple databases or tables).
The example below assigns a Validation Rule and Validation Text to a field using DAO.
Option Compare Database
Option Explicit

Public Function SetFieldValidation(tblName As String,
                                   fldName As String,
                                   validRule As String,
                                   validText As String) As Boolean
    On Error GoTo ErrHandler

    Dim db As DAO.Database
    Dim tdf As DAO.TableDef
    Dim fld As DAO.Field

    Set db = CurrentDb
    Set tdf = db.TableDefs(tblName)
    Set fld = tdf.Fields(fldName)

    fld.ValidationRule = validRule
    fld.ValidationText = validText

    SetFieldValidation = True
    Exit Function

ErrHandler:
    SetFieldValidation = False
End Function

' Example usage:
Public Sub Demo_ApplyValidation()
    Dim ok As Boolean
    ok = SetFieldValidation("Customers",
                            "Age",
                            "(>= 65) OR Is Null",
                            "Enter a number 65 or greater, or leave it blank.")
End Sub
What to do after you add a rule
After adding a Validation Rule, test it in the same ways real data enters your database:
- Enter valid and invalid values directly into the table (datasheet view).
- Enter values through forms (if your users primarily use forms).
- If you import data, run a small import test to confirm the rule blocks invalid rows the way you expect.
The best validation rules are specific, easy to explain, and paired with clear Validation Text. When your table enforces correctness, everything built on top of it becomes faster to build and easier to trust.
In the next lesson, you will learn how to set the Validation Text property to display a custom message.
Adding Validation Rule - Exercise
Adding Validation Rule - Exercise
Adding Validation Rule - Exercise
Adding Validation Rule - Exercise