| Lesson 8 | Aligning and sizing multiple controls |
| Objective | Work with multiple controls and know how to align and size them all at once. |
Aligning and Sizing Multiple Controls
You saw in the last lesson how to change properties for more than one control at a time. Now we will look at an alternative way to highlight more than one control and to align and size those controls once they have been highlighted.
- An alternative way to highlight Multiple Controls
The method of highlighting multiple controls using the Shift key is useful when you need to highlight some controls without highlighting others near it. When you want to select multiple controls in an area and are in a hurry, then you can use a drag-and-drop method:
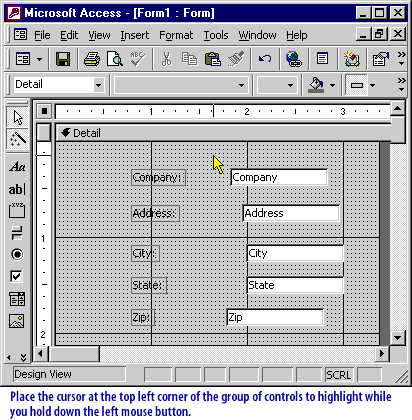
- Place the mouse at one corner of the controls to be highlighted.
- Hold down the left mouse button.
- Drag the cursor over to the opposite corner of the controls to be highlighted.
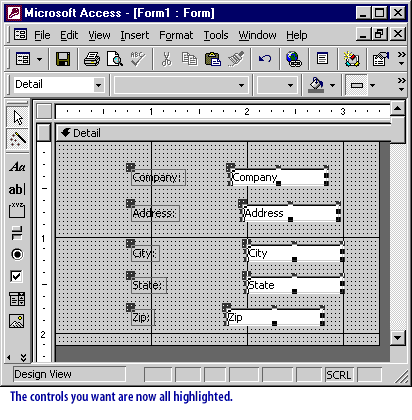
- Release the mouse button.
The controls are now highlighted.
Aligning and sizing Controls
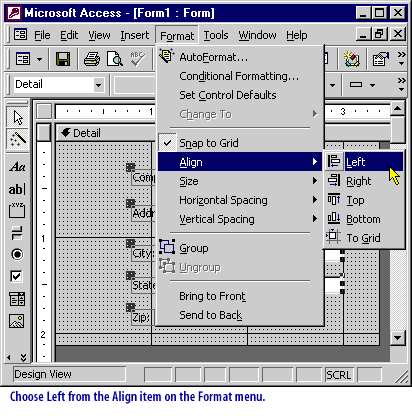
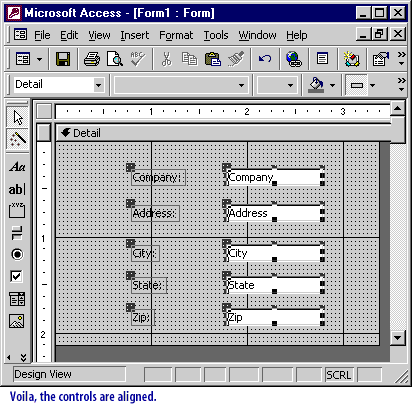
Once the controls are highlighted, you can align them by choosing Align from the Format menu.
You will then have to make a choice. Some of the choices are Left, Right, Top, and Bottom. For sizing, the most commonly used choices are To Tallest, To Shortest, To Widest, and To Narrowest.
The steps to align or size multiple controls are:
You can see how controls are affected by sizing and aligning by walking through the Slide Show below.
The steps to align or size multiple controls are:
- Select all the controls to align/size.
- Choose Align or Size from the Format menu.
- Choose the option of the task you want to perform.
You can see how controls are affected by sizing and aligning by walking through the Slide Show below.
Aligning Multiple Controls- Access
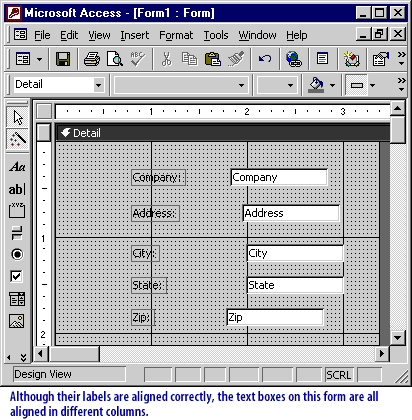
- Company:
- Address:
- City:
- State:
- Zip:
1) Printed Labels on the Form (Text)
The labels (static text) present on the form:
- Company:
- Address:
- City:
- State:
- Zip:
2) Corresponding Data Fields (Text Boxes) Each label has an associated text box, which is where data entry occurs:
- Company → Text Box (aligned to the right)
- Address → Text Box (aligned to the right)
- City → Text Box (aligned to the right)
- State → Text Box (aligned to the right)
- Zip → Text Box (aligned to the right)
Observations:
- The labels are correctly aligned, but the text boxes are misaligned (scattered across different columns).
- The instruction at the bottom suggests using the mouse selection method to highlight all controls for alignment.
- This issue can be corrected using the "Align" feature in Microsoft Access to properly position the text boxes under their respective labels.
Would you like guidance on fixing the alignment in Microsoft Access? 2) Place the cursor at the top left of the group of controls to highlight while you hold down the left mouse button.
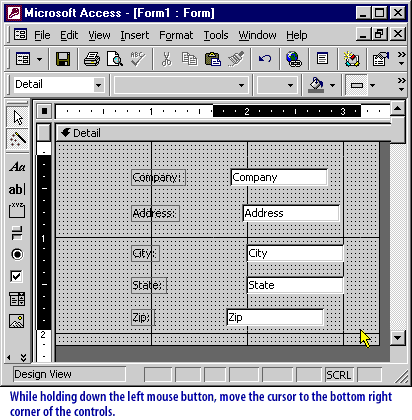
In the next lesson, you will learn how to modify the various form sections (headers, footers, and detail).