Identify the toolbox buttons and use them to add controls to a form.
Use Toolbox to add Controls to your Access Form
In the last lesson you learned how to add a bound control with a label to your form. But there are more types of controls than the label and text box you create using that method. The toolbox buttons enable you to create any type of control for your form.
View the Table below to see a chart of some of the more common types of controls.
Access Toolbox
Toolbox button name
Button
Control description
Label
Contains text such as a title or caption; this is a static (unbound) control
Text box
Displays data from a selected field; this is a bound control
Check box
Displays a checkbox bound to a Yes/No field
Combo box
Displays a drop-down list for possible entry into the selected field; a field defined with the lookup wizard will automatically appear on a form as a combo box
List box
Displays a list of values from which the user can choose; a list box may be bound or unbound
Image
Displays an image from an image file on the form; this is an unbound control
Unbound Object Frame
Displays an image or other object on the form; this is an unbound control
Bound Object Frame
Displays an image or other object on the form; the source for the object must be stored in a field; this is a bound control
Page Break
Inserts a page break at the location of this control; affects only the printing of the form
Subform/Subreport
Inserts a subform into the main form
Line
Displays a user-defined line in the form
Rectangle
Displays a user-defined rectangle in the form
Microsoft Access
Although you have a variety of control types to choose from, the actual action of placing a control in a form is not difficult.
First make sure that the toolbox is displayed by clicking the Toolbox button on the toolbar. The toolbox icons may appear anchored to one side of the Access window. The first two buttons, Select Objects and Control Wizards, should be selected.
The following series of images demonstrates the process of using the toolbox to add a control to a form.
Add Control using Acces Toolbox
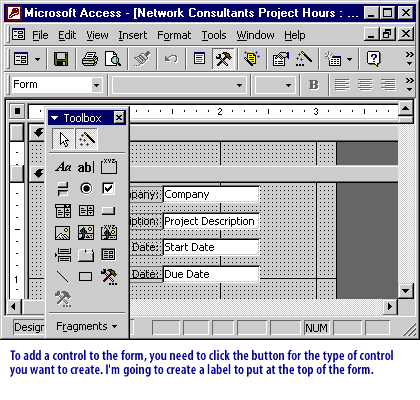
1) To add a control to the form you need to click the button for the type of control you want to create.
I'm going to create a label to put at the top of the form.
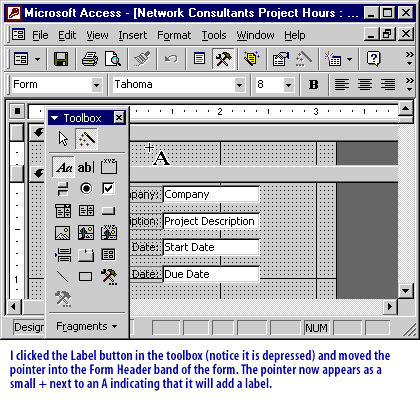
2) I clicked the label button in the toolbox notice it is depressed and moved the pointer into the form header band of the form the pointer now appears as a small + next to an A indicating that it will add a label
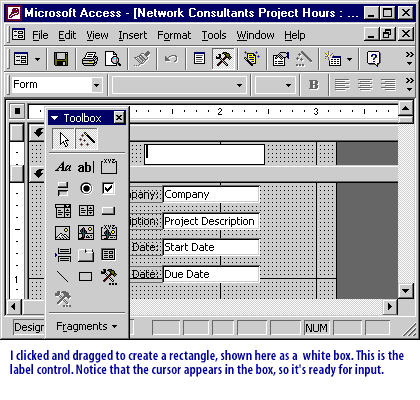
3) I clicked and dragged to create a rectangle shown here as a white box this is the label control notice that the cursor appears in the box so it is ready for input.
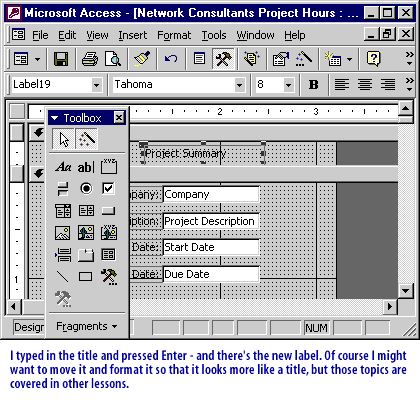
4) I typed in the title and pressed enter and there is a new label. Of course I might want to move it and format it so that it looks more like a title, but those topics are covered in other lessons.
If you chose one of the more complex control types, like a List box or Object Frame a wizard or dialog box will spring open to guide you through the process of creating the control. The next lesson will discuss how to format your form controls.