Access has a built in feature to create mailing labels easily. It is called the Label Wizard because this wizard requires key strokes
Create Labels using Label Wizard
To quickly review the basic steps and some good practices, you can start by creating a report to print event badges.
This will use the built-in features for labels to get a preset size. You will also customize the look by formatting the company name, using the person's preferred name if it is provided, and formatting the fields to emphasize the person's name and company. You might also include conditional formatting, such as designating a color based on the role of the person. You could also include a company or event logo, a barcode, or other event specific fields.
You can use a similar approach for envelopes, address labels, and other purposes.
Start by selecting query qryEventPerson as the record source. Then on the Create Ribbon, go to the Reports tab and click the Label button.
This opens the Label Wizard. To quickly create a name badge that will fit in most badge holders, you might choose Avery 4168, continuous feed, to create name badges that are 2 1/6 inches tall by 4 inches wide. After clicking Next, you can customize the font. This example uses Calibri, size 10, Medium weight in the default black color. After clicking Next, you will begin selecting the fields to appear on the badge.
View the series of images below to learn more about mailing labels in Access.
Create Labels using the Label Wizard
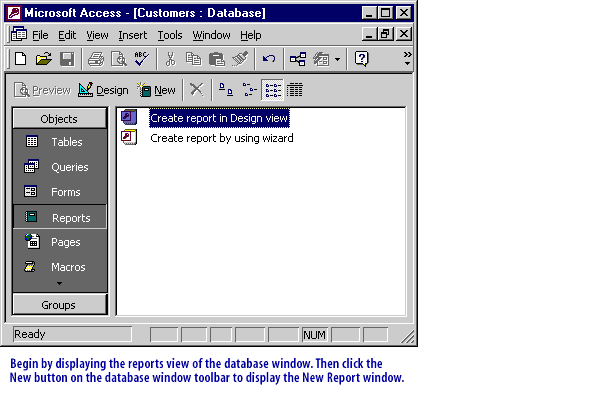
1) Create labels using the Label Wizard 1
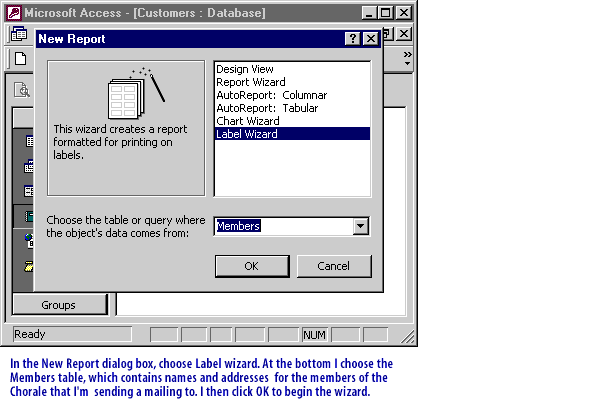
2) In the New Report dialog box, choose label wizard at the bottom.
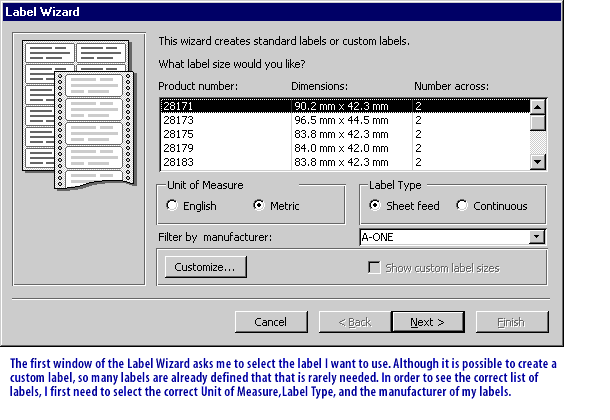
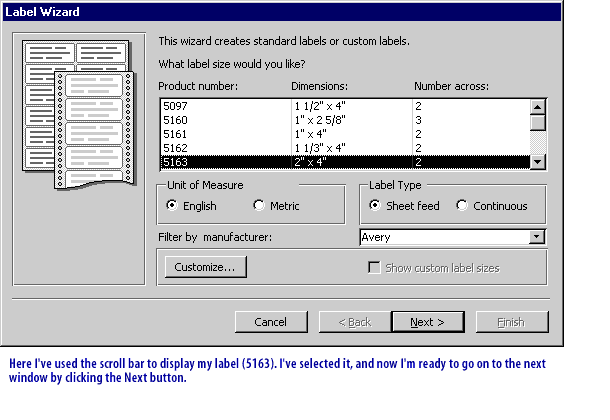
3) The first window of the Label Wizard asks me to select the label I want to use.
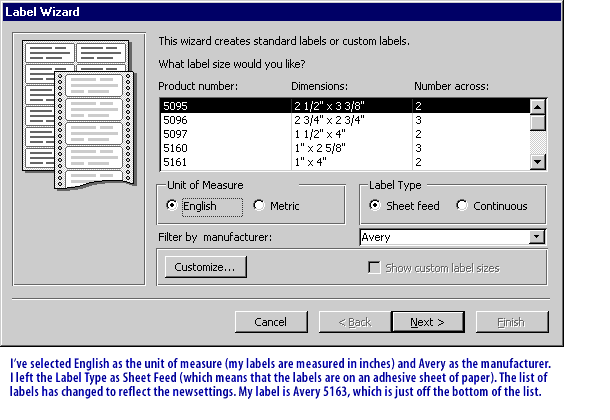
4) I have selected Enlgish as the unit of measure (my labels are measured in inches) and Avery as the manufacturer.
5) Here I have used the scroll bar to display my label (5163), I have selected it, and now
I am ready to go on to the nexst windpow by clicking the Nexst button.
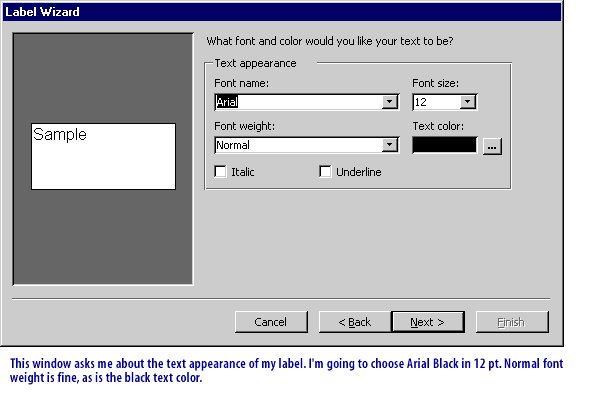
6) This window asks me about the text appearamce of my label. I am going to choose Arial black in 12 pt.
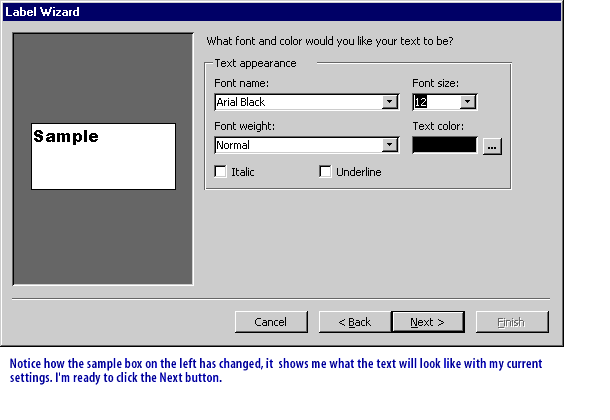
7) Notice how the sample box on the left has changed.
It shows me what the text will look like with my current settings. I am ready to click the next button.
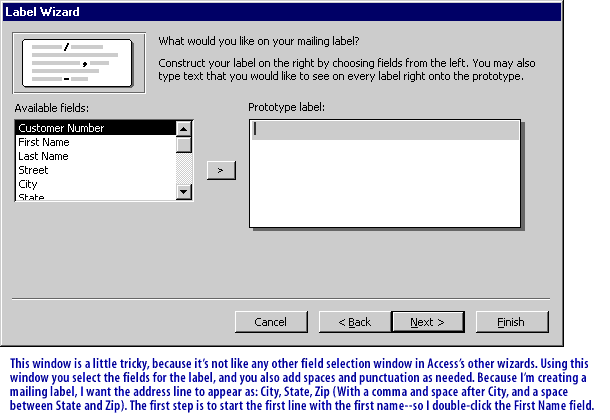
8) This window is a little tricky because it is not like any other field selection window in Access's other Wizards.
Using this window you select the fields for the label and you also add spaces and punctuation as needed.
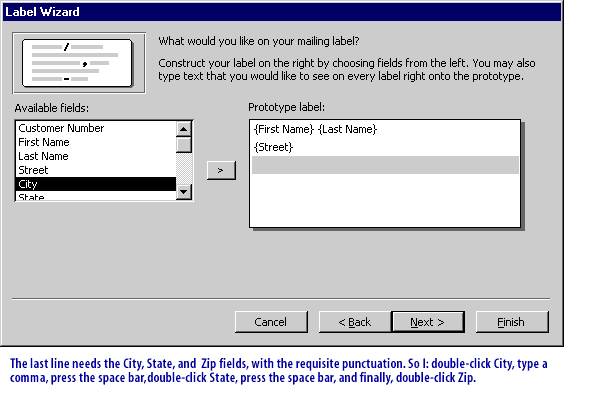
Because I am creating a mailing label, I want the address line to appear as City, State, Zip
(With a comma and space after city and a space between state and Zip.)
The first step is to start the first line with the first name so I double click the "First Name" field.
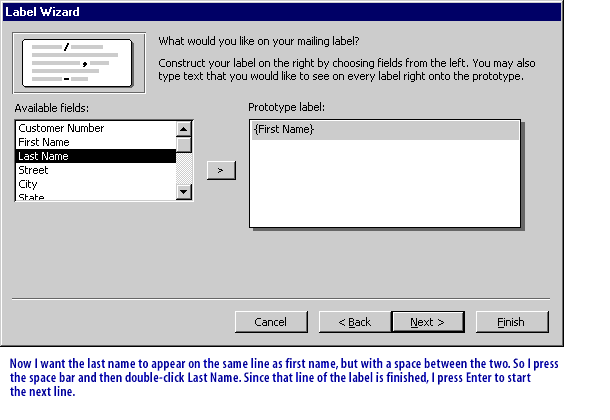
9) Now I want the last name to appear on the same line as first name, but with the space between the two.
So I press the spacebar and then double click Last Name. Since that line of the label is finished, I press enter to start the next line.
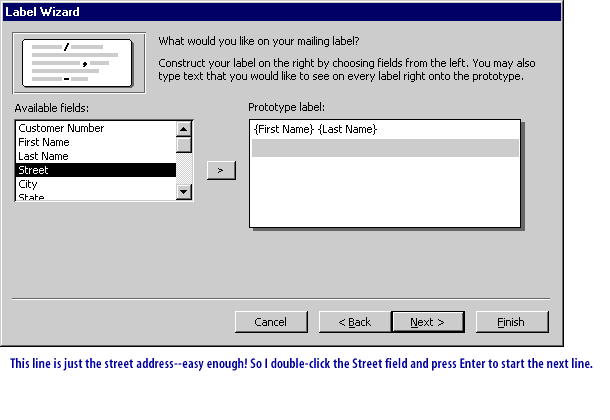
10) This line is just the street address, so I double click the Street field and press "Enter" to start the next line.
11) The last line needs the City, State and Zip fields with requisite punctuation.
So I double click "City" type a comma, press the space bar, double click State, press the space bar, and finally double-click Zip.
12) Ready for the next window
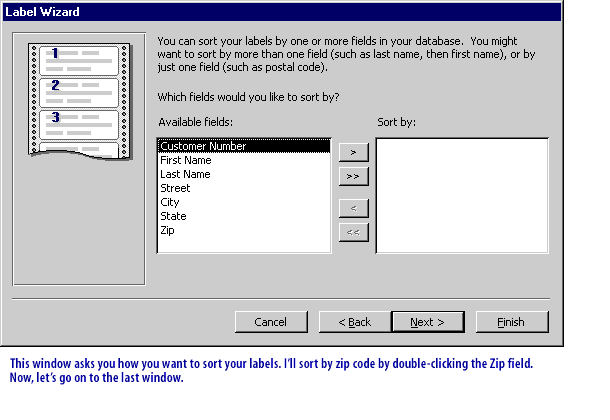
13) This window asks you how you want to sort your labels,
I will sort by zip code by double clicking the Zip field. Now let us go on to the last window.
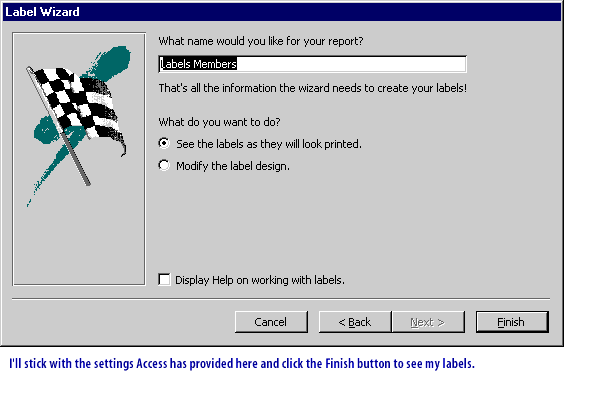
14) I will stick with the settings Access has provided here and click the "Finish" button to see my labels.
15) The label wizard creates my report with the text perfectly located to print one address on each label.
You can edit this report in design view, but if you want to use the "Label Wizard" you have to create a whole new report.
Mailing Label Reports
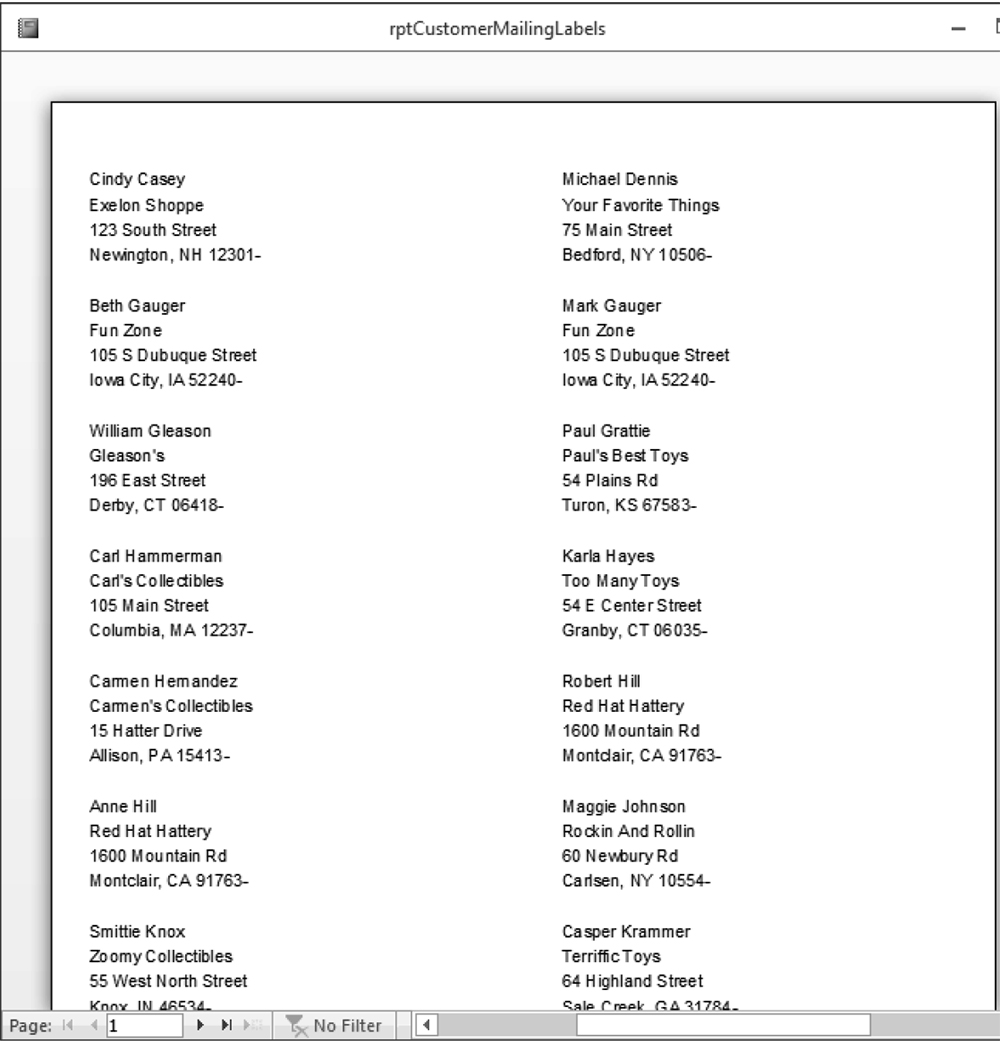
Mailing labels (shown in Figure 5.6) are also a type of report. Access includes a Label Wizard to help you create this type of report. The Label Wizard enables you to select from a long list of label styles. Access accurately creates a report design based on the label style you select. You can then open the report in Design mode and customize it as needed.
Figure 5.6: rptCustomerMailingLabels, a typical mailing label report.
Creating Mailing Labels - Exercise
Use this exercise to practice creating mailing labels from the Clients list. Creating Mailing Labels - Exercise
In the next lesson, learn about the features of the Report Design view.